Nav area code

Retro Restyling - Restore - Restyle - Repurpose
Retro Restyling on FacebookRetro Restyling on TwitterRetro Restyling on PinterestRetro Restyling on Instagram

Friday, December 7, 2012

Well That's Pinteresting | Homemade Whipped Mens Body Wash

Yesterday I felt like I needed to be wearing a white lab coat while concocting crazy stuff in my kitchen. In all actuality the final product to what I originally planned on making whipped up another end result. No pun intended... ok, it was intended. I initially was going to work on creating some handmade liquid hand soap which I found on Pinterest.


I thought to myself:
Just as much as we need liquid hand soap in this house (I never buy it because it's so expensive), we need body wash badly for the boys, all three of them including my hubs.

I wonder if I would be able to swap out soaps and make something comparable to a body wash instead of just a hand soap.

My boys love the smell of Irish Spring, but hate the tackiness it leaves on your skin after you use it.
Would I be able to create a body wash with that soap and be able to ditch the tackiness in the process?

What I bought at Wal-Mart:

2 - 2 Qt Rubbermaid Containers - $1.98 each
1 - 6 oz bottle of Glycerin (found by skin protectants) - $3.88
1 pack of 2 bars of Irish Spring - $.94

I already had on hand:

A grater and large bowl
A blender/mixer
A pickle jar to hold extra shavings
A "tablespoon" measuring spoon
A "cup" dry measuring cup
A "cup" liquid measuring cup
A big pot to heat everything up with

(Disclaimer: I always buy a lot of stuff at Wal-Mart because I find it cheaper and easily accessible.
I'm sure you can find these supplies at whatever store you prefer.)


The first thing I did was grate the soap (I almost typed cheese.. silly me.) With it being deodorant soap it was soft and easy to grate. The recipe I used called for 2 cups of soap. 2 bars of Irish Spring shredded made 3 cups so I stored the extra cup in the pickle jar.


I then put 10 cups of water into my big 'ol pot and 2 tablespoons of glycerin plus the 2 (full, not packed) cups of soap. I turned the heat up and slowly brought it to a boil.


After the concoction came to a boil I didn't let it cook for long, just long enough to make sure everything melted. With the bars being deodorant they took a few minutes to melt down. When it was cooled down a bit I carefully poured the liquid into both of the containers. I could have poured into just one, but I didn't know whether it would expand or not during the cooling process.


After I poured out the liquid into the containers I was left with this crappy residue in the pot that I actually had to take my own dish soap and clean out. That distressed me because I didn't like the fact that I would have to clean soap with soap.

It got me thinking, "Uh oh... is this going to work?"


I put the open containers in the fridge to speed the cooling process up... I would say they were in there about 4 hours. When I came to get them out I noticed they didn't expand at all, they just gelled up after cooling completely. It was weird... like one big cold glop of gel.

Again I thought, "Dang... I don't think this is going to work."


So then my husband comes home from work and is like... "What are you doing?" I tell him I'm playing chemist today and he should check out my cool soap I'm making. He proceeds to shake the ever living CRAP out of one of the bottles after he scowls at the gross gel like substance it turned into.

*enter extremely bright light bulb above my head*

I whipped out my blender...
(again, no pun intended - Oh whatever, you should know me better by now...)
...and realized that I'm missing a gasket at the bottom of the glass top so I can't blend the soap to make it mix better. So I grabbed my mixer and plopped a container of the soap stuff in a bowl and beat it on a low/med speed. 


Seriously? Are you kidding me? Whipped body wash??

SCORE!!!

I used just one container - so half of what I created - and filled up our empty body soap dispenser from previous body soap I bought at Walmart (which was almost $4!). Then I had a TON left over. The whipping expanded it like crazy so I put a bunch of it back into one of the containers.


Ha, look at my wrinkled old looking hands. That's too much hot water use on your hands ladies... 

So this is what it looks like when you squirt it out of a dispenser. It's very foamy and soft. I tossed my 7 year old in a bath and used him as the guinea pig. I had to squirt about 3 pumps into a bath puff to get it to lather up well, but it definitely did the trick.

So let's do some math...
After looking at the cost of supplies up top, just for the soap and the Glycerin alone, you're looking at maybe 6-8 bottles of whipped body soap for $1.60?
I think it actually might be less than that.

Goodness... I'll bite at that anytime.

TIP TIME

1.
Unfortunately the tackiness the boys hate still slightly lingers around after a bath/shower. I'm sure that if you decide to use a moisturizing bar (even a men's bar like Dial for Men) it wouldn't leave this film. Good 'ol Irish Spring for ya...

2. 
After sitting all last night until today the whippedness of the soap is still whippy and holding well. It hasn't settled at all, which makes me uber happy.

3.
At first I didn't think I'd need the 2 containers, but it's a good idea to have them on hand just in case your batch ends up large.


Alrighty folks! That's my post for the day!
If you choose to make some of this please let me know how it goes!!

Make sure to pin one of my pictures from this post please!!

Next week I'll be making some more handmade cleaners so stay tuned!!!!

Friday, November 30, 2012

Well That's Pinteresting | Christmas Party Lights


Can I say that I just adore Pinterest?
I am so thankful there is a site where I can sit day to day and be thoroughly blown away by the creativity of people and have the ability to share things I love with everyone as well! That's where these posts come into play: real life pinterest recreations with tips and tricks on how it's done efficiently and inexpensively.

Just recently I saw a pin by Miss Mustard Seed showing the process of how to create very cute party lights with a string of white Christmas lights, dixie cups and scrap-booking paper.


I thought to myself:
Those are super cute and I bet you could make them specifically for
whatever party you are having by customizing the paper. 

I wonder how that would look with regular Christmas lights?

How would the paper hold up outside in the elements?

After checking out the visual instructions in the pin,
could there be an easier, quicker way to recreate this?


What I bought at Walmart:

1 bag of  Great Value 3 oz. 100 plastic dixie style bath cups - $1.98

I already had on hand:

An X-Acto Knife
A multi-color 100 bulb strand of lights
(if you needed to buy these supplies you'd be looking at about $8 total for both)


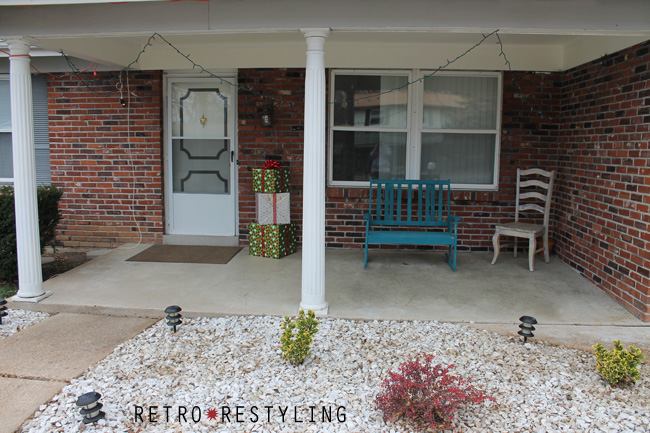
The first thing I needed to do was hang my lights up the way I thought they would look the best outside. I'm sure any 'ol way would work, but I draped mine across my front porch from one side to the next. I know they are kind of hard to see in the light during the day.

Hey check it out!!
There's my Christmas Gift Porch Decor boxes I recently posted about!
I really like the way they turned out, they look great outside!


I took my X-Acto knife and cut a half inch X shape in the bottom of the cups, that way the cups could stick right on to the lights with no problem. That's the end of a sharpie to give you a size reference.


I took all of the 100 plastic cups outside and for about 5 minutes quickly stuck them on every light (it was really stinkin' cold out there). They slipped right on and hung on pretty well, so it was pretty easy to do.


They could be Christmas lights, they could be Party lights, either way they turned out pretty nifty. I like the way the colors are projected through the cups. Instead of being one single dinky light it's a full cup of color awesomeness.

TIP TIME

1.
The reason I like using the plastic cups vs. the paper cups is they can get wet and they won't get ruined. The paper cups would work great for an indoor party, or even an indoor porch, but I believe this would be your best bet for something outside.

2.
With no cutting of a paper stencil to put paper on these cups it took no time at all to do this. It was super easy and cheap, especially if you already have the lights you want to use.

3.
You CAN write on these cups.
You can take a black sharpie and draw designs and make them more interesting than just regular light projecting plastic cups. With the lights flipping this way and that I wouldn't suggest letters. I wrote some on a few cups to see what it would look like and you couldn't read them.


There ya go! That was simple and fun, wasn't it?
I think I'm going to make these weekly posts on Friday's instead of Tuesday's that way you have something creative to work on for your weekend! Like you don't have enough to do right? haha!

Make sure to pin one of my pictures from this post please!!

Stay tuned for next weeks post when I start diving into household handmade cleaners!
It's time to take it back to the good old days and stop wasting so much money at the store!!


Wednesday, November 28, 2012

Well That's Pinteresting | Christmas Gift Porch Decor

Hello there everyone!
I've been spending some time on Pinterest lately and have found that there are so many good ideas and items that I can recreate myself for our home. I guess that's the whole purpose behind Pinterest, right? So I decided that I'll be sharing these things in weekly posts called "Well That's Pinteresting". I'll show you all the deets on how I recreated what Pinspired me, such as: the cost, the process itself, some tips, plus a few ideas and possible tweaks I come up with too.

First up, being the Christmas season and all (and moving into our new home with absolutely no Christmas decor other than a blow up snowman, so you know we need some stuff around here) I figured I would focus on some cute decor for the outside of the home. I saw this pin for these super cute wrapped Christmas gift boxes and I knew that I would be able to pull off something close to it and it be rather inexpensive. Here they are in all their cuteness:


I love the way they are stacked with a little bit of a tilt. I also know that I wouldn't really be able to pull that off because there are a lot of kiddos and toys flying around this neighborhood. I could see a pile of boxes on my front porch tipping over with a quickness. Plus, I'm not even sure how they did that without some type of Harry Potter spell. Looks pretty, and complicated, and I really didn't want to spend too much time working on something simple. Inexpensive simplicity is what I'm going for here people!! :)

Here's what I bought at Walmart:

3 staggered sized packing boxes - less than $3
One large shiny red bow - $2.50
One large roll of Christmas paper - $2.50

I already had on hand:

Packing tape
Trash bags
Two empty containers to hold water
Some left over Christmas paper from last year
Some red shiny ribbon from my wedding 3 years ago


First off I filled my bottles up with some high quality H20, as the Water Boy would call it. The bottles of water were to keep the boxes weighed down so they wouldn't blow off. Just because I knew the temps would drop outside then heat back up, I put the bottles in their own trash bags to keep the condensation from ruining the cardboard when/if any water would freeze and then thaw.


Here's the boxes stacked and taped. I would say they are about 40-45 inches tall or so stacked like this.


Here's the middle box wrapped in different paper than the bottom one in the background.


Check em out!!! Too cute!!!

Granted, they don't have the funky cool tilt and all, but they were super easy and cheap to make... way better than buying some pre-made stuff at a big box store.

TIP TIME
Here's the time where I tell you what I learned during this process, that way I can pass on good knowledge to you so you don't have any issues if you decide to make something like these boxes:

1.
Two bottles probably isn't going to cut it for weight in the boxes. I put just the two in the bottom box, an old gallon can of paint I didn't really want in the middle box (that way if it freezes and goes bad I won't care), and some grout we had in a bag in the top box.

2.
Buy enough paper and ribbon. These boxes are big and you'll need a good sized roll of both to cover everything. The average sized paper roll I bought was just barely enough for the bottom and top box. I definitely didn't have enough for the middle box so I used two different kinds.

3.
Be careful when you are putting the ribbon under the box after wrapping. You don't want to tip over whatever you have inside of the box weighing it down.


Aaaaand that would be it!!
There's not much else I could suggest other than have fun wrapping some pretend gifts and don't get a paper cut, those smart!

Make sure to pin one of my pictures from this post please!!
Stay tuned for next week when I tackle an outdoor Christmas light idea!!

Related Posts with Thumbnails